Are there specific color combinations for different types of friendships? String friendship bracelets have been a beloved tradition for generations. These handmade accessories symbolize connection, loyalty, and shared memories. Typically made from embroidery floss, they feature colorful patterns and simple knots. Many people first learn to make them during childhood summers or camp experiences.
Over time, the craft has evolved into a creative movement embraced by all ages. Adults now use string friendship bracelets for gifts, events, and even small businesses. Their charm lies in both the process and the result. Creating one takes focus and care. Giving it away shows thoughtfulness and affection. As more individuals seek meaningful ways to connect, string friendship bracelets remain a timeless choice.
 Introduction to Friendship Bracelets
Friendship bracelets are handmade tokens of affection. They are typically given to friends as symbols of care and connection. These bracelets can be made using different materials, with string being the most common choice.
String friendship bracelets are popular because they are colorful, lightweight, and easy to craft. Making one involves knotting strings in various patterns to form a decorative piece.
These bracelets have roots in various cultures. They became widely known in the U.S. during the 1970s as a gesture of friendship and solidarity. Today, they remain a simple yet meaningful gift that can be customized to suit individual tastes.
Crafting string friendship bracelets is an enjoyable activity for people of all ages. Whether you make them alone or in a group, the process is both fun and relaxing. Beginners can start with basic designs and progress to intricate patterns over time.
In addition to being a creative expression, friendship bracelets foster bonds among friends. The effort and time spent making one reflect genuine care for the recipient. As a result, these bracelets carry sentimental value that lasts for years.
Materials Needed to Make Friendship Bracelets
To make string friendship bracelets, you need a few simple materials. Here’s a list of the essentials:
- Embroidery Floss or Craft String: These strings are colorful, strong, and perfect for knotting. They come in a variety of colors and textures, allowing you to customize your bracelet.
- Tape or Clipboard: These tools help secure your strings while you work on your bracelet. Use tape to stick your strings to a table, or clip them to a clipboard for stability.
- Scissors: Sharp scissors are necessary to cut the strings to your desired length. Make sure they can trim cleanly to avoid fraying.
- Measuring Tape or Ruler: Use these tools to measure your string length properly. Consistent lengths ensure the bracelet knots evenly.
- Optional Beads and Charms: If you want to add a unique touch, incorporate small beads or charms into your design.
Begin your bracelet with these materials on hand to simplify the crafting process. Gathering everything before starting ensures uninterrupted work and better organization.
 Popular Types and Styles of Friendship Bracelets
Friendship bracelets come in various types and styles. Each type has its unique charm and design.
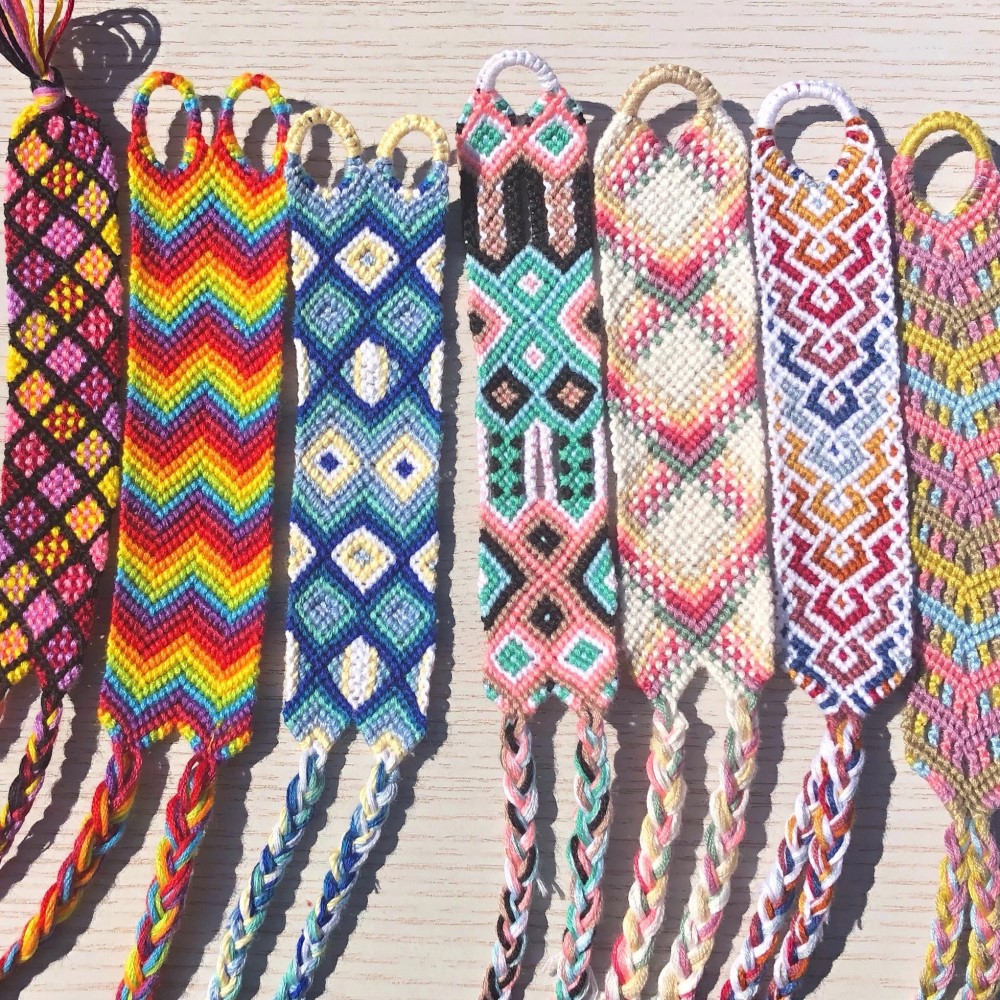
Embroidery Floss Bracelets
Embroidery floss bracelets use colorful, smooth strings. These are perfect for detailed patterns and knots.
Leather Friendship Bracelets
Leather bracelets are sturdy and have a sleek look. They may include beads or metal accents.
Beaded Friendship Bracelets
Beaded bracelets feature small decorative beads. These can form designs or add a playful shimmer.
Braided Bracelets
Braided bracelets are simple and beautiful. They combine multiple strands in an elegant braid pattern.
Knotted Bracelets
Knotted bracelets use different knotting techniques. They can include macramé, square knots, or spiral knots.
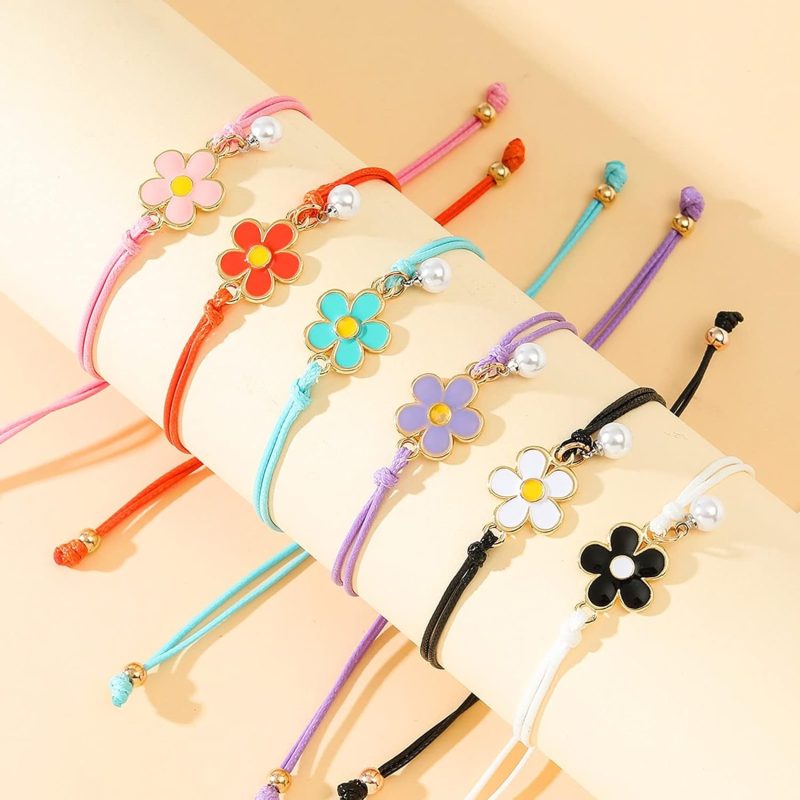
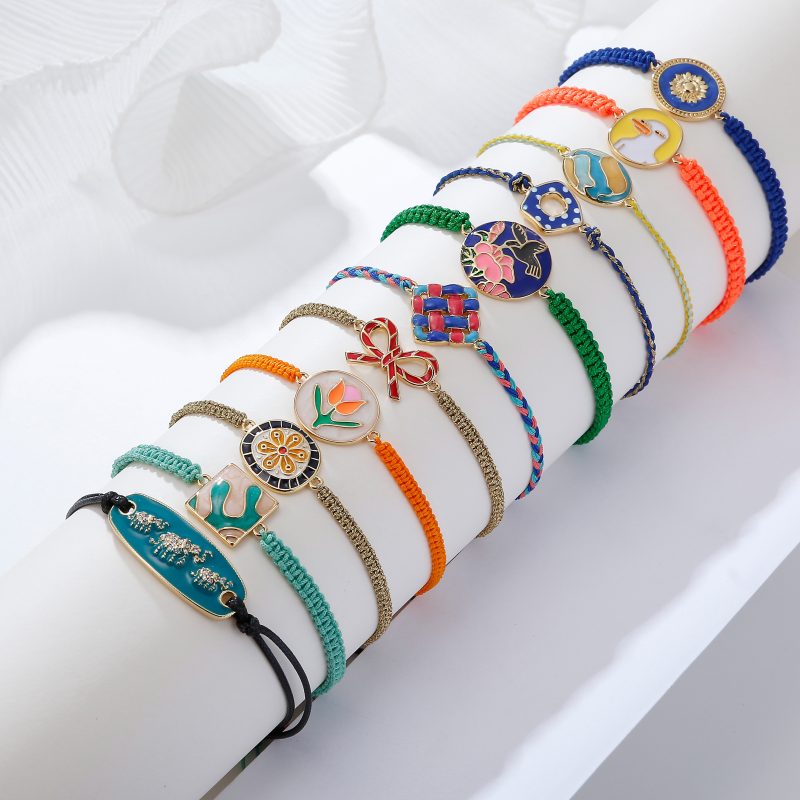
Charm Bracelets
Charm friendship bracelets have tiny charms. These charms symbolize personal interests or meaningful memories.
Woven Bracelets
Woven bracelets mimic fabric textures. They often involve looms for a refined and intricate look.
Cuffed Bracelets
Cuffed friendship bracelets are thick and bold. They are usually wide and designed for a modern statement.
Each style of these friendship bracelets offers creativity. Choose one that suits your style and preferences.
Step-by-Step Guide to Making a Basic String Friendship Bracelet
Making a string friendship bracelet is simple and fun. Follow these steps to create one:
Gather Your Materials
- Choose colorful embroidery floss or craft string.
- Use scissors to cut strings to equal lengths (about 24-30 inches).
- Secure your strings with tape or a clipboard to keep them steady.
Arrange Your Strings
- Line up the strings and tie a knot at one end.
- Secure the tied end on a flat surface using tape or your clipboard.
- Spread out the strings to avoid tangling.
Decide on a Pattern
- Start with a simple knotting pattern like a forward knot.
- Choose colors to create repetitive or alternating designs.
- Plan your pattern before beginning.
Begin Knotting
- Take the first string and cross it over the second string (like making a “4” shape).
- Pull the first string under the second string and through the loop.
- Pull tight to create a forward knot.
- Repeat this process with all strings to continue the pattern.
Repeat the Pattern
- Keep knotting rows using the chosen pattern.
- Adjust tightness to ensure even rows.
- Double-check your design as you progress.
Finish the Bracelet
- Once it’s long enough, tie a knot at the end.
- Trim extra strings, leaving some length for tying.
- Secure the bracelet around your wrist or give it as a gift.
That’s how you can make a basic string friendship bracelet. Practice will improve your skills.
 Advanced Techniques and Patterns
Once you’ve mastered basic string friendship bracelets, it’s time to try advanced techniques. These methods add complexity and uniqueness to your creations. Here are some techniques and patterns for experienced crafters:
1. Chevron Pattern
This popular design creates a V-shaped pattern. Alternate knotting from the edges to the center. Use multiple colors for a vibrant look. Adjust tightness for a consistent design.
2. Candy Stripe Pattern
The candy stripe pattern features diagonal lines. Knot strings in one direction across all rows. Use bold and contrasting colors for a striking effect.
3. Diagonal Stripes with Backward Knots
Add interest by incorporating backward knots. Alternate between forward and backward knots. This creates a unique diagonal twisting effect.
4. Diamond Pattern
The diamond pattern forms a series of repeating diamond shapes. It combines forward and backward knots strategically. Plan your colors to highlight the diamond designs.
5. Alpha Patterns
Alpha patterns allow you to create images, words, or symbols. Arrange the strings to form a grid-like pattern. Use this technique to personalize bracelets with names or icons.
6. Macramé Techniques
Experiment with macramé knots like the square knot and spiral knot. These methods create textured and detailed designs. Incorporate beads for added charm and uniqueness.
7. Multicolor Gradient Effects
Blend colors smoothly by arranging threads in gradient tones. This creates an ombre or faded effect. The result is an elegant, eye-catching bracelet.
8. Ladder Stitch Bracelets
The ladder stitch involves weaving one string around a set of parallel threads. This technique creates a structured, uniform design. It allows you to showcase bold color combinations.
9. Intertwined Hearts Pattern
This design forms a series of connected heart shapes. It’s perfect as a romantic or meaningful gift. Use contrasting or soft colors to emphasize the hearts.
10. Two-Tone Spiral
The two-tone spiral combines twisted patterns with contrasting colors. Create loops or spirals through repeated forward and backward knots. Add beads between spirals for extra detail.
These advanced techniques elevate your string friendship bracelet designs. They allow you to express creativity and refine your craft. With practice, you can create truly stunning and intricate pieces by combining different patterns and styles.
Tips for Choosing Colors and Patterns
Choosing the right colors and patterns is key to making beautiful string friendship bracelets. With some thought and creativity, you can craft designs that truly stand out and reflect personality.
Consider the Personal Preference
- Think about the recipient’s favorite colors.
- Choose colors that match their personality or style.
- Opt for bold or soft tones as per their liking.
Pick a Theme
- Select colors based on a specific theme like nature, holidays, or emotions.
- For a beach theme, use blue, green, and sand hues.
- Use red and pink for a romantic theme.
Experiment with Color Combinations
- Mix bright and neutral colors for balance.
- Try complementary colors for a striking effect.
- Incorporate gradient shades for an ombre look.
Focus on Patterns
- Begin with easy patterns like stripes or chevrons.
- Use geometric designs for a modern look.
- Incorporate shapes or symbols to add uniqueness.
Consider Meaningful Colors
- Research color meanings and associations.
- Blue symbolizes calm, yellow signifies happiness, and green represents growth.
- Pick meaningful colors that reflect feelings or memories.
Match Occasion Colors
- Design bracelets based on special events.
- Use red and green for Christmas-themed bracelets.
- Opt for pastel colors for birthdays or spring occasions.
Choosing colors and patterns brings life to friendship bracelets. Look for inspiration and let your creativity guide each design.
 How to Finish and Secure Your Friendship Bracelet
Finishing and securing your string friendship bracelet properly is an essential part of the process. A well-secured bracelet ensures durability and a neat appearance. Follow these steps to complete your bracelet effectively:
1. Tie a Final Knot
- When the bracelet reaches the desired length, tie a strong knot at the end.
- Ensure the knot is tight to keep the design intact.
- Press the knot firmly to secure it in place.
2. Trim Excess Strings
- Use sharp scissors to carefully cut any extra string.
- Leave about ? inch of string after the final knot.
- This extra length helps to adjust the fit later if needed.
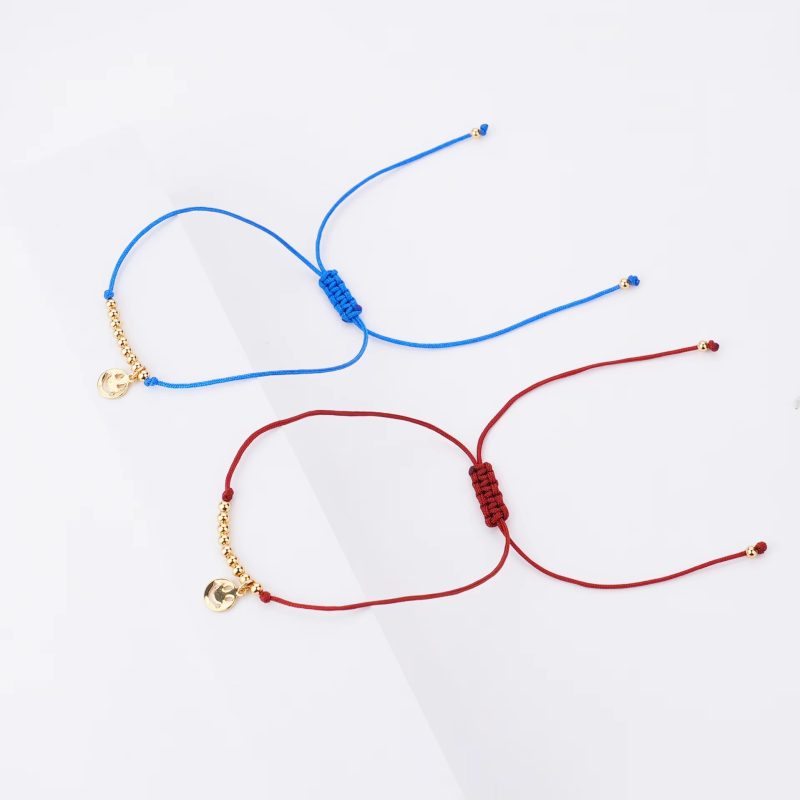
3. Create a Loop Closure (Optional)
- Make a loop using the extra string before the final knot.
- Slide the bracelet through the loop to create a secure fastening.
- This method is adjustable and user-friendly.
4. Add a Beaded or Button Closure
- Thread a bead or button onto the end of the bracelet.
- Tie a secure knot behind the bead or button to hold it.
- Use the bead or button as a clasp to fasten the bracelet.
5. Use a Braided or Twisted Tie-End
- Divide the leftover strings into two or three sections.
- Braid or twist them together for a decorative tie-end.
- Secure the tie-end with a small knot to prevent unraveling.
6. Tie the Bracelet Around the Wrist
- Wrap the bracelet around the wrist of the recipient.
- Tie a double knot to prevent it from loosening during wear.
- Ensure the fit is comfortable and not too tight.
7. Melt the Ends (For Synthetic Strings)
- If using synthetic string, gently melt the ends with a lighter.
- This prevents fraying and increases the bracelet’s lifespan.
- Be cautious to avoid damaging the bracelet or causing burns.
Taking care while finishing and securing your bracelet improves its look and longevity. With these techniques, you can present a polished and lasting string friendship bracelet.
Creative Ideas for Customizing Your Friendship Bracelets
Customizing your string friendship bracelets can make them even more unique and special. Adding personal touches enhances their sentimental value. Here are some creative ideas to make your bracelets stand out:
1. Use Unique Color Combinations
- Experiment with bold and unexpected color mixes.
- Combine shades for a gradient or ombre effect.
- Match the colors to themes like holidays or seasons.
2. Incorporate Beads and Charms
- Thread colorful beads between the knots.
- Add charms that symbolize personal interests.
- Use letter beads to spell names or meaningful words.
3. Tie-Dye Your Strings
- Use fabric dye to create one-of-a-kind patterns on plain strings.
- Combine different dye colors for a vibrant effect.
- Let the dyed strings dry completely before knotting.
4. Add Patterns and Textures
- Experiment with advanced patterns like chevrons or diamonds.
- Include textures like macramé or twisted techniques.
- Use embroidery to stitch designs onto the braided bracelet.
5. Mix and Match Materials
- Pair string with leather strips for a mixed-media look.
- Add metallic threads or fine wire for a unique shimmer.
- Use scraps of fabric strips for a boho-inspired touch.
6. Personalize with Pendants
- Attach small pendants like initials or zodiac signs.
- Use shaped beads for added detail and meaning.
- Secure pendants with sturdy knots or split rings.
7. Weave in Natural Elements
- Use wooden beads or shells for a rustic, beachy look.
- Add feathers or gemstones for an earthy vibe.
- Secure natural elements tightly to avoid breaking.
8. Feature Hidden Messages
- Use alternate knots or colors to create secret words or shapes.
- Weave in Morse code patterns with knots and beads.
- Combine contrasting colors to make secret patterns stand out.
9. Play with Length and Shape
- Make multi-wrap bracelets for a layered style.
- Try a mix of thin and wide bracelets in one design.
- Add tassels or fringes for extra flair.
10. Design for Specific Occasions
- Use festive colors for holidays (red and green for Christmas).
- Create themed bracelets for birthdays or weddings.
- Add symbols like hearts, stars, or flowers for special meaning.
These creative ideas can make each bracelet feel special and memorable. Let your imagination transform your string friendship bracelets!
Frequently Asked Questions
Common Concerns Answered Clearly
Can adults make them too? Yes. Many grown-ups enjoy the hobby. It reduces stress and sparks creativity. No age limit applies.
How long do they last? With care, several months. Heavy use may shorten lifespan. Expect 2–6 months on average.
Can I wash my hands with one on? Not recommended. Remove it first. Wet knots loosen faster. Cotton absorbs water quickly.
Are they safe for kids? Yes, with supervision. Scissors and small parts need caution. Teach safe handling early.
What if I run out of thread? Stop and re-cut. Leave enough for tying off. Never stretch thin ends.
Do they come in waterproof materials? Some use nylon cord. It resists water better. Cotton remains the favorite for tradition.
Can I sell the ones I make? Yes, if allowed by local laws. Many sell online or at craft fairs. Credit original designers if using patterns.
Is there a left or right wrist rule? No. Wear it on either side. Some believe left means “waiting,” right means “taken.” It’s personal.
 Final Thoughts
How can I make friendship bracelets that last for years? String friendship bracelets continue to bring people together across ages and cultures. They are simple in design but powerful in meaning. Each knot ties two lives closer. Every color tells a story.
More than just crafts, they represent time, effort, and emotion. In a world full of digital noise, they offer something real. Something handmade. Something lasting.
Whether you’re giving one to a best friend or making your first pattern, the act itself matters. The focus, the care, the intention—all leave a mark. And when worn, that mark stays visible.
As trends come and go, string friendship bracelets remain a constant. They adapt, evolve, and inspire new generations. So pick up your floss, choose your colors, and start tying. Because every friendship deserves a token—and this one wears beautifully.