Silver jewelry is a timeless accessory that adds elegance and charm to any outfit. However, over time, silver pieces can lose their shine and become tarnished due to exposure to air, moisture, and everyday wear. Fortunately, knowing how to polish silver jewelry effectively can restore its original brilliance, making your treasured pieces look as good as new. How to clean silver jewelry with baking soda and aluminum foil? In this comprehensive guide, we will explore various methods and tips on how to polish silver jewelry, ensuring it remains a stunning part of your collection for years to come.
 Introduction to Silver Jewelry Care
Silver jewelry boasts timeless beauty and an enduring appeal, but it requires proper care to maintain its luster and charm. Over time, silver can tarnish, losing its shine and appearing dull. This tarnish results from a chemical reaction between silver and sulfur-containing substances in the air, leading to a layer of silver sulfide. Tarnished silver can diminish the appeal of your jewelry, making it vital to understand how to polish silver jewelry effectively.
To ensure your silver remains radiant, it’s essential to clean and polish it regularly. Regular care prevents extensive tarnishing, which can be more challenging to reverse. This is where home methods for silver care come into play. Using simple household items, you can easily restore tarnished silver jewelry to its former glory. Not only is this approach cost-effective and convenient, but it’s also gentle on your precious items.
Home methods for polishing silver jewelry tap into basic chemistry principles and use common kitchen ingredients. This DIY approach is safe for your jewelry and the environment. It allows you to avoid harsh chemicals found in commercial silver polishes, which can strip away more than just the tarnish. With the right materials and techniques, you can achieve professional results right from the comfort of your home. In our next sections, we’ll explore how to assess when it’s time to polish your silver jewelry and share a step-by-step guide to do it yourself.
Assessing the Tarnish: When to Polish Your Silver Jewelry
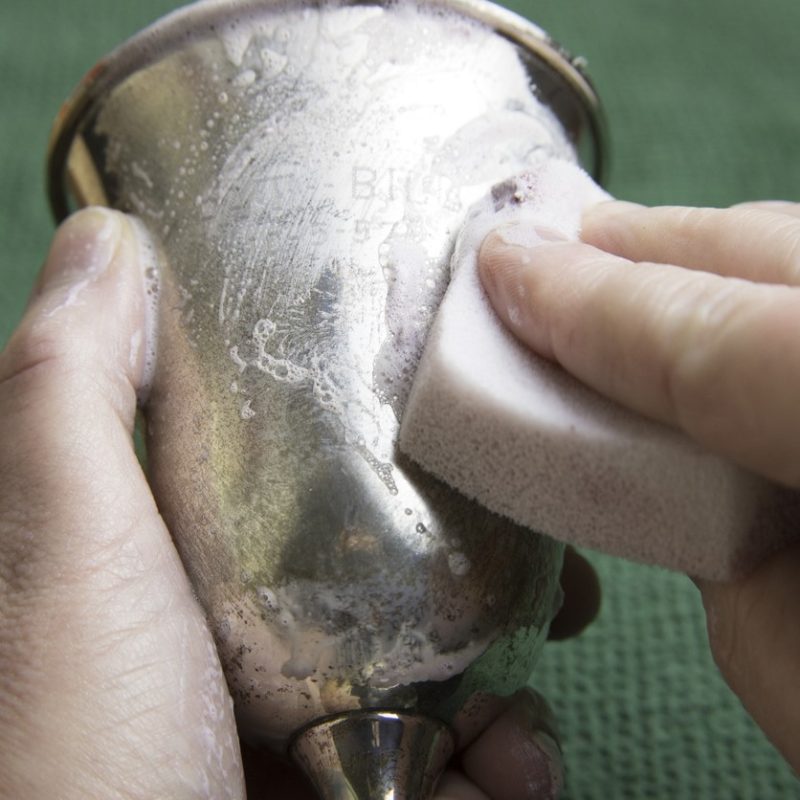
Knowing when to polish your silver jewelry is key to keeping it bright and beautiful. Check your silver pieces regularly for signs of tarnish, a dull or grayish film that can develop when silver reacts with sulfur-containing substances in the air. Pay special attention to any black spots that indicate more severe tarnishing. Jewelry that you wear frequently may tarnish less, as the constant friction and exposure to air and light can slow down tarnishing. However, pieces stored away or seldom worn often require more frequent polishing.
To determine if it’s time to polish, compare the shine and color of your silver jewelry against a piece that you know is clean or newly polished. If the contrast is stark, it is likely time to polish. For lightly tarnished pieces, a quick buff with a soft cloth may suffice. Whereas, a darker, more pronounced tarnish will require the DIY polishing method that involves kitchen ingredients, which we’ll cover in the upcoming sections.
In essence, assessing tarnish doesn’t just involve the level of discoloration but also how often you wear the jewelry and where you store it. Regular assessment and prompt polishing will ensure that your silver jewelry maintains its luster over time.
DIY Silver Polish: A Kitchen Chemistry Approach
Transforming tarnished silver into shiny treasures is possible right in your kitchen. Simple household products can create an effective DIY silver polish. This approach is safe, eco-friendly, and gentle on your jewelry.
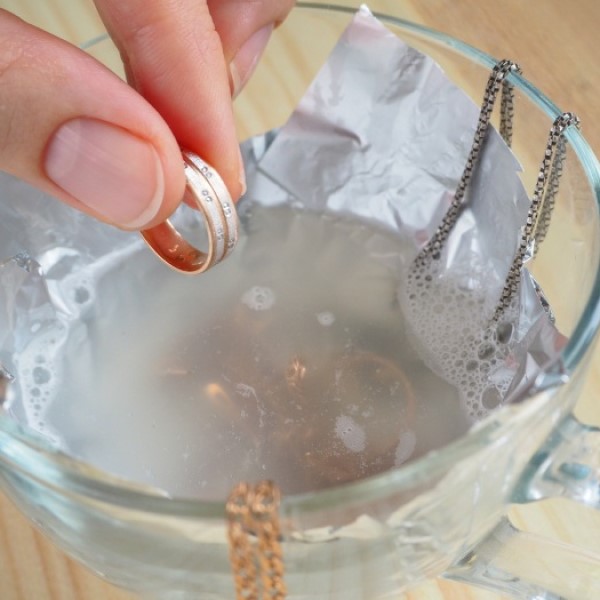
You don’t need commercial polish to restore silver’s luster. Baking soda, salt, and aluminum foil work together to undo tarnish. The process is straightforward and doesn’t harm the silver’s surface. It leverages a chemical reaction to clean without abrasive scrubbing.
To start, you will need aluminum foil, baking soda, salt, and hot water. Cover a bowl with foil, shiny side up. Dissolve baking soda and salt in hot water, then soak your silver. Ensure jewelry makes contact with the aluminum. A chemical reaction will occur, lifting tarnish away. After a few minutes, remove, rinse, and dry your silver.
This kitchen chemistry method avoids the harsh effects of typical polishes. It preserves the intricate detailing of your jewelry. And it requires only ingredients found in most homes. No special tools or knowledge needed.
So why does this work? Baking soda acts as a gentle cleanser. Salt helps transfer the tarnish to the aluminum. The foil, when heated, creates a chemical exchange that pulls tarnish from silver.
Choose this kitchen chemistry approach for a simple, affordable solution to polish your silver jewelry. It’s proven effective and accessible for anyone to use.
Step-by-Step Guide for Polishing Silver at Home
Polishing silver jewelry at home is simple and cost-effective. Using common kitchen items, you can remove tarnish and restore shine. Here’s how to do it step by step:
- Gather Your Materials: You’ll need aluminum foil, hot water, baking soda, and salt.
- Prepare the Container: Line a bowl with aluminum foil, shiny side up.
- Create the Solution: Dissolve one tablespoon of baking soda and one tablespoon of salt into the hot water.
- Submerge the Jewelry: Place your silver jewelry in the solution, making sure it touches the aluminum.
- Wait for the Reaction: A chemical reaction occurs, lifting tarnish from the silver. Leave it for about five minutes.
- Check the Jewelry: After five minutes, turn the jewelry over, ensuring it’s still in contact with the aluminum.
- Remove and Rinse: Take the jewelry out, rinse under cold water, and dry with a soft cloth.
- Buff for Shine: Use a clean, dry cloth to buff the silver to a shine.
This method is not only easy but also preserves the detail of your jewelry. The kitchen chemistry takes care of the tarnish without abrasive scrubbing.
 The Science Behind Silver Cleaning: Explaining the Chemical Reaction
Silver tarnishes due to a reaction with sulfur in the air, forming silver sulfide. The chemical reaction used to clean silver jewelry at home is a simple and fascinating process. It involves a transfer of electrons and a change in the composition of the substances involved. Here’s a deeper look at the science behind it.
When you use the DIY kitchen chemistry method for polishing silver, the key players are baking soda, salt, aluminum foil, and hot water. Baking soda, or sodium bicarbonate, acts as a mild alkali that helps to dissolve the tarnish. Salt, or sodium chloride, works along with the aluminum foil to create an electrochemical reaction.
The tarnish on the silver, which is silver sulfide, reacts with aluminum in the presence of a salt solution. This reaction happens because aluminum has a stronger reaction to sulfur than silver. When the silver sulfide touches the aluminum foil, the sulfur atoms transfer from the silver to the aluminum. This shifts the silver sulfide back to silver metal and forms aluminum sulfide instead.
The reaction can be summarized by the formula:
3 Ag2S + 2 Al + 6 H2O → 6 Ag + Al2S3 + 3 H2O
It shows how silver sulfide and aluminum react in water to yield silver, aluminum sulfide, and water.
The presence of hot water speeds up the reaction, helping the baking soda and salt dissolve more completely and interact with the tarnished silver. You can see the reaction happening as it produces tiny bubbles, which is hydrogen gas being released.
This reaction allows the tarnish to be removed without harming the silver itself. Unlike abrasive polishing, which removes layers of silver along with the tarnish, this method preserves the silver’s surface and detail. It’s a clever use of everyday chemistry to shine your silver jewelry!
Professional Polishing vs. Home Methods: Understanding the Difference
When it comes to silver care, you have two options: professional polishing or home methods. Each has pros and cons, and the best choice may vary depending on the situation.
Pros of Professional Polishing
- Expertise: Jewelers have skills to handle intricate pieces.
- Equipment: Professionals use high-grade tools for a deep clean.
- Convenience: Drop off your jewelry and pick it up shining.
- Longevity: Professional care can extend your jewelry’s life.
- Repair Services: Jewelers can fix damages during polishing.
Cons of Professional Polishing
- Cost: It can be expensive to polish frequently.
- Time: You might wait days for your jewelry back.
- Accessibility: Not always available in remote areas.
Pros of Home Methods
- Savings: Home polishing saves money over time.
- Instant Results: Shine your silver when needed, instantly.
- Control: You can be gentle with delicate pieces.
- Convenience: No need to travel, polish at home.
Cons of Home Methods
- Risk: Incorrect methods may damage jewelry.
- Effectiveness: May not be as thorough as professional services.
- Time Consuming: It takes time to clean at home.
In essence, professional polishing is ideal for treasured pieces needing extra care or when you lack time. Home methods work well for regular maintenance and when saving cost is a priority. Keep the [keywords] ‘how to polish silver jewelry’ in mind when deciding which method to use for your precious items.
 Tips for Preventing Tarnish on Your Silver Jewelry
Taking proactive steps to prevent tarnish can save you time and keep your silver shiny.
- Wear It Often: Silver that’s worn regularly tarnishes less quickly. Your skin’s oils help keep it clean.
- Keep It Dry: Moisture is a culprit for tarnish. Always dry your silver jewelry if it gets wet.
- Avoid Chemicals: Contact with household chemicals, beauty products, and chlorinated water speeds up tarnishing.
- Store Properly: Use anti-tarnish cloth or pouches when storing silver. This reduces exposure to air.
- Use Chalk: Store a piece of chalk with your silver. It absorbs moisture and helps prevent tarnish.
- Separate Metals: Keep different metals apart when stored to reduce tarnishing from metal-to-metal contact.
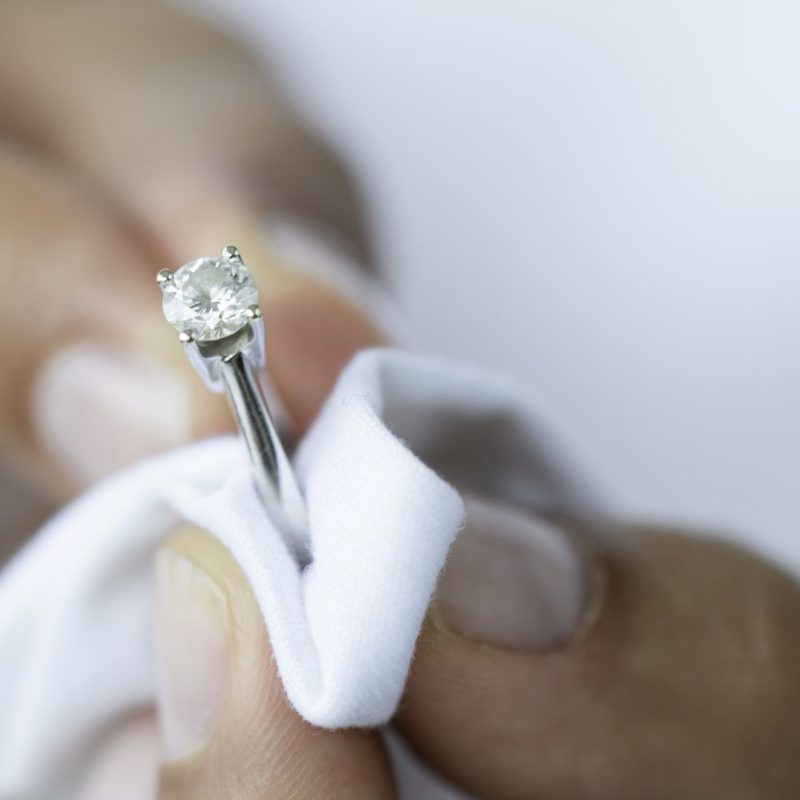
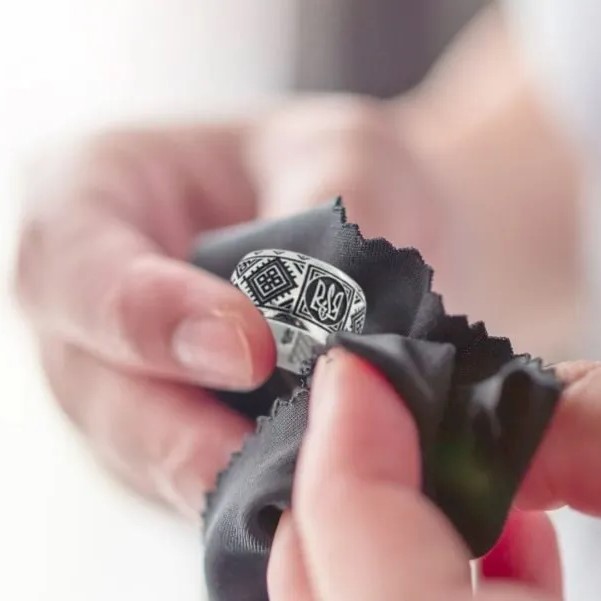
- Polish Gently: Use a soft cloth for regular light polishing. This will help maintain luster without heavy tarnishing.
- Keep Air Out: When storing, seal your silver in airtight bags or containers to limit oxygen exposure.
By following these easy tips, you can help keep your silver jewelry bright and free from tarnish. Regular maintenance coupled with proper storage methods will ensure that your silver pieces require less frequent heavy cleaning, preserving their beauty for years to come.
Caring for Oxidized Silver: Special Considerations
Oxidized silver jewelry has unique needs for care. This kind of silver has a dark finish intentionally. It highlights design details by contrasting black with shiny silver. But, cleaning it the wrong way can damage the look. Here is how to care for it correctly.
- Gentle Cleaning: Use a soft, dry cloth when your oxidized silver looks dull. Avoid wet or chemical cleaners. These can strip the dark finish from your silver.
- No Silver Dip: Silver dips are too harsh for oxidized silver. They can remove the oxidized finish. This will spoil the special antique look.
- Avoid Abrasives: Don’t use baking soda or toothpaste on oxidized silver. These can scratch and remove the finish.
- Storage: Store oxidized silver in a dry place. Use an anti-tarnish bag or cloth. This helps protect the unique finish.
- Wear With Care: Be mindful when wearing oxidized silver. Lotions and perfumes can affect the finish. Put them on before your jewelry.
- Regular Checks: Look at your oxidized silver often. Check for wear or damage. This way, you can address any issues early.
By following these simple tips, you can keep your oxidized silver jewelry looking its best. Remember, the darkened finish needs different care than shiny silver. Handle it gently, store it safely, and clean it correctly.
 Maintenance and Storage: Keeping Your Silver Shiny
After polishing your silver jewelry, proper maintenance and storage are key to keeping it sparkling. Here are simple steps to ensure your silver remains shiny and tarnish-free.
- Regular Wiping: Use a soft, lint-free cloth to gently wipe your silver after each wear. This removes oils and dirt that can cause tarnish.
- Dry Environment: Store your silver in a dry place. Humidity can speed up the tarnishing process. Consider using silica packets for extra dryness.
- Separate Storage: Keep silver pieces apart. Metals can react with each other, causing more tarnish. Use separate bags or compartments.
- Avoid Plastic Bags: Some plastics emit chemicals that can tarnish silver. Instead, use silver cloth bags or acid-free tissue paper.
- Wear After Cosmetics: Put your jewelry on after applying makeup, lotions, or perfumes, to reduce chemical exposure that can tarnish silver.
- Use Anti-Tarnish Products: Anti-tarnish strips or cloths can help prevent tarnish. Place them where you store your jewelry.
- Regular Check-ups: Look at your silver regularly. Check for early signs of tarnish and polish lightly as needed with a soft cloth.
By following these maintenance and storage tips, your silver jewelry will stay bright and beautiful for years to come. Always remember that taking care of silver is as important as knowing how to polish silver jewelry. Proper care will minimize the need for frequent polishing, preserving the quality and appearance of your treasured pieces.
 Preserving the Beauty of Your Silver Jewelry
How to remove tarnish from silver jewelry at home? Understanding how to polish silver jewelry is a vital skill for any silver enthusiast. By following the methods and tips outlined in this guide, you can effectively remove tarnish and maintain the lustrous shine of your silver pieces. Regular cleaning and proper storage will ensure your jewelry remains a radiant testament to timeless elegance.
In conclusion, knowing how to polish silver jewelry not only enhances its beauty but also extends its lifespan. Whether you prefer using commercial silver polishes, household items like baking soda and aluminum foil, or gentle brushing techniques, there are various ways to achieve sparkling results. Remember to handle your silver with care, store it properly, and clean it regularly to keep it looking its best. With these practices, your silver jewelry will continue to shine brilliantly, adding a touch of sophistication to every occasion.