Introduction
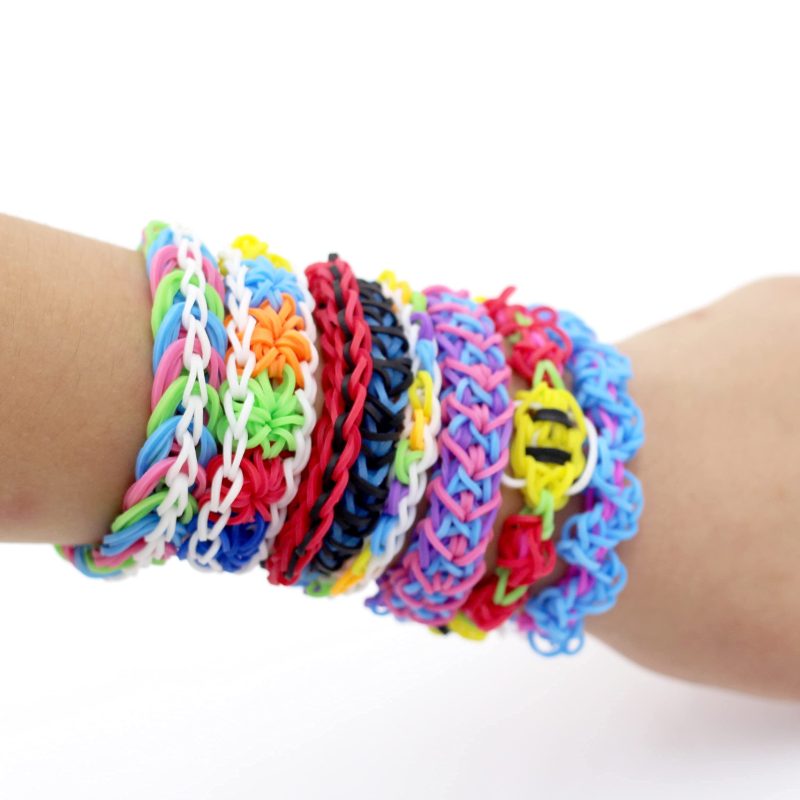
Rubber band bracelets are a popular and fun craft activity for people of all ages. These colorful accessories come together with just a handful of inexpensive materials and a bit of creativity. Ideal for parties, fundraisers or just a creative afternoon, these bracelets can vary from simple and understated to complex and elaborate designs.
With the rise of DIY culture, making rubber band bracelets has evolved into a form of self-expression and style. They also serve as great gifts for friends and family. This guide will set the foundation for your crafting journey. Learn the basics and soon you’ll be creating unique rubber band bracelets from the comfort of your home.
To start, you’ll discover what materials you’ll need. Then, we’ll walk through the process step by step. We’ll also explore ways to enhance your designs and introduce advanced techniques for those who are ready to take their creations to the next level. Let’s dive in and start making your very own rubber band bracelets!
Materials Needed for Making Rubber Band Bracelets
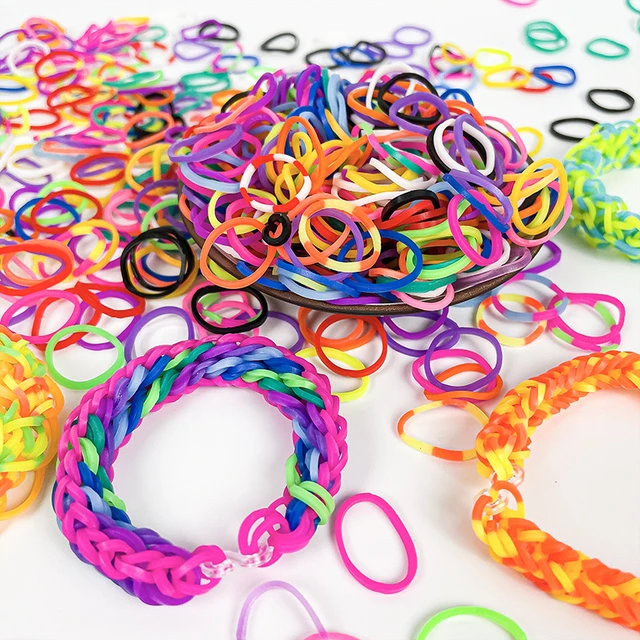
To start making your own rubber band bracelets, some basic materials are necessary. Here’s what you’ll need:
- Rubber Bands: These are the essential building blocks for your bracelets. Look for colorful and stretchy rubber bands specifically made for crafting bracelets.
- C-Clips or S-Clips: These small clips help to secure the ends of your bracelet together.
- Loom: While not essential for simple designs, a loom can make the weaving process easier, especially for more complex patterns.
- Hook Tool: This tool is useful for pulling and manipulating the rubber bands while weaving. If you don’t have a hook tool, a simple crochet hook or even a pencil can suffice.
- Charms and Beads (Optional): To personalize your bracelets, you can add charms or beads.
- Storage Container: A container can help keep your materials organized and easy to access.
Gather these items and you’re ready to begin. Creativity is your only limit as you mix and match colors and textures to make a unique piece. Rubber band bracelets are not only enjoyable to make but also inexpensive, making them perfect for crafters on a budget.
Step-by-Step Instructions for Basic Rubber Band Bracelet
Creating your first rubber band bracelet is easy with these simple steps. Take your chosen rubber bands, plus the C-clips or S-clips you’ve collected. Make sure you have a clear space to work and let’s begin:
- Choose Your Colors: Pick out a few rubber bands in your preferred colors. This will be the palette of your bracelet.
- Start the Chain: Take one rubber band, twist it into a figure-eight shape, and fold it back onto itself. This is the first link of your chain.
- Add More Rubber Bands: Place another rubber band through the loops of the first one. Do not twist this rubber band.
- Continue Adding: Repeat the preceding step. Keep adding rubber bands, always through the loops of the previous one. Ensure they lie flat and are not twisted.
- Create the Length: Keep building until the chain is long enough to fit comfortably around your wrist. Pull it gently to check the size.
- Secure the Ends: Take a C-clip or S-clip and hook it onto the last rubber band. Stretch the bracelet and fasten the other end of the clip to the first rubber band in the chain.
- Adjust and Check: Make sure that all the rubber bands are properly attached and the clips are secure. The bracelet should look neat and even.
Congratulations! You’ve now made a basic rubber band bracelet. This simple loop and build technique is the foundation of many more complex patterns you can try as you gain more confidence. Remember, practice makes perfect and with each bracelet, you’ll improve your skill.
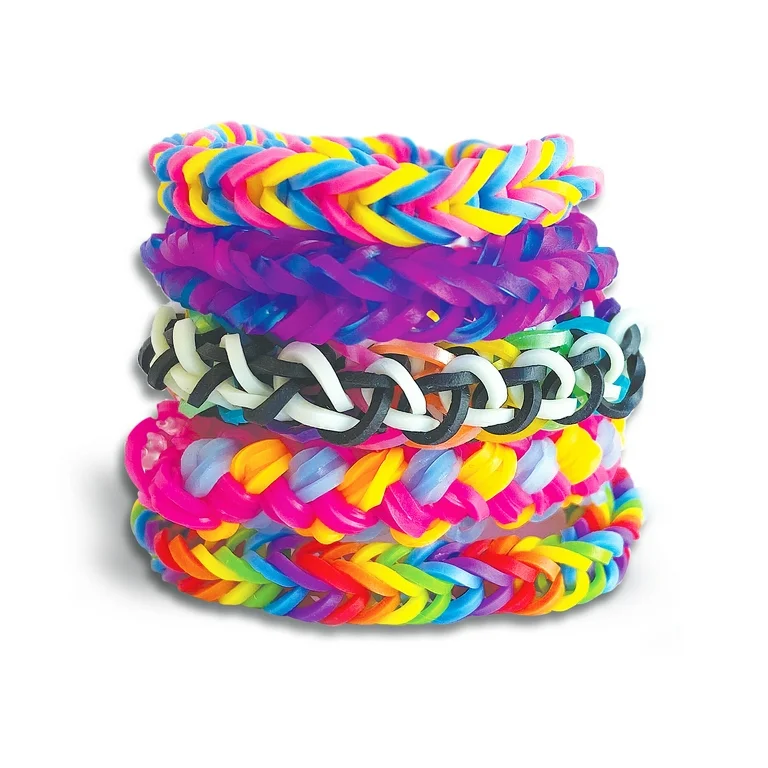
Creative Patterns and Designs for Inspiration
Moving beyond the basics, you can transform simple rubber band bracelets into eye-catching designs. Exploring creative patterns and styles can turn a simple bracelet into a statement piece. Here are some patterns and design ideas that can inspire your next creation:
- Fishtail Pattern: By using two pegs of your loom or just your fingers, you can create a braid-like pattern. The result is a neat and tight fishtail design.
- Rainbow Loom: With a multitude of colors, make patterns that mimic a rainbow. This cheerful design is great for brightening your wrist or giving as gifts.
- Charm Bracelets: Incorporate charms between rubber bands to personalize your creation. This can represent your interests or memories.
- Beaded Bracelets: Slide beads onto the rubber bands before linking them for an embellished look. Choose beads that complement the rubber bands’ colors.
- Hexafish Bracelet: This is a six-pin pattern that results in a thick, 3D bracelet. It’s perfect for those who love a chunky accessory.
- Ladder Bracelet: Make a series of interconnected squares for a ladder-like effect. This structured pattern looks complex but is simple to achieve.
- Starburst Bracelet: Create a star pattern radiating from the center. It’s a playful and vibrant design that catches the eye.
Using these designs, your rubber band bracelets can become wearable art. Mix and match different themes, or try monochromatic schemes for a chic look. You can even mirror seasonal colors to suit the holidays. The key is to experiment and have fun!
Tips and Tricks for Perfect Bracelets
Turning your rubber band bracelets from simple to spectacular might require a few tips and tricks. Here, we’ll share some advice to help you refine your craft and produce stunning bracelets every time.
Choose High-Quality Materials
Start with the best rubber bands you can find. High-quality bands won’t break easily and offer vibrant colors. This ensures a durable and attractive bracelet.
Maintain Even Tension
As you weave or loop bands, keep tension consistent. Uneven tension can lead to warped bracelets or even cause them to snap.
Use a Loom for Complex Patterns
For intricate designs, a loom is helpful. It keeps bands organized and can help maintain even spacing throughout your bracelet.
Keep Your Workspace Organized
An organized space helps you find what you need quickly. Sort your bands and clips before starting. This cuts down on mistakes and confusion.
Practice the Pattern Before Starting
Try patterns with spare bands first. Once comfortable, start on your actual bracelet. This saves materials and frustration.
Secure Your Ends Well
When finishing, make sure C-clips or S-clips are firmly attached to the bands. A loose end can unravel your hard work.
Take Breaks
If a pattern is challenging, taking breaks can help. Come back with fresh eyes and you might find the task easier.
By keeping these tips in mind, you’ll increase your chances of creating flawless rubber band bracelets. Remember, patience and practice are as important as the material you use. Happy crafting!
How to Finish and Secure Your Rubber Band Bracelet
Properly finishing your rubber band bracelet is crucial for durability and wearability. Follow these steps to ensure your bracelet stays intact and looks great:
- Check the Length: Confirm that the bracelet fits comfortably around your wrist. It should not be too tight or too loose.
- Examine for Weak Points: Look over your bracelet for any loose bands or potential break points.
- Attach the C-Clip or S-Clip: Stretch the last rubber band slightly and slide the C-clip or S-clip onto it. Ensure it’s secure.
- Connect the Ends: Stretch the bracelet and attach the other side of the clip to the first rubber band in your chain.
- Double Check the Clip: Ensure the clips are fastened well. A loose clip can cause the bracelet to fall apart.
- Tug Gently: Give a soft tug on the bracelet to make sure everything is held together properly.
- Make Adjustments if Needed: If any bands are uneven, gently adjust them until the bracelet looks symmetrical.
Once secured, your rubber band bracelet is ready to wear. It’s now strong and fashionable for everyday use. With these simple steps, you can confidently finish your DIY project and show off your creation.
Care and Maintenance
Keeping your rubber band bracelets in top shape is simple. Here are some straightforward care and maintenance tips:
- Avoid Water and Chemicals: Water can weaken the elastic, and chemicals can cause colors to fade. Remove bracelets before swimming or bathing.
- Clean with a Damp Cloth: If your bracelet gets dirty, lightly dab it with a damp cloth. Avoid soaking.
- Store Properly: Keep your bracelets in a dry place away from direct sunlight. This prevents them from getting stretched out or losing color.
- Regular Inspections: Check your bracelets often for signs of wear and tear. Replace any weak or broken bands.
- No Excessive Stretching: When putting them on or taking them off, stretch the bracelets gently. Too much force can cause them to break.
Following these steps will ensure your rubber band bracelets stay vibrant and intact for longer. Enjoy wearing your handmade creations with the confidence that they will last.
Advanced Techniques for Experienced Crafters
For those who have mastered the basics of making rubber band bracelets, there’s a world of advanced techniques to explore. These methods will allow you to craft more complex and intricate designs, further elevating your bracelet-making skills. Here are some advanced techniques for experienced crafters:
- Double Banding: Use two rubber bands at once to add strength and boldness to your designs.
- Inverted Patterns: Learn to invert your stitches for a unique look that adds depth to your bracelet.
- Adding Layers: Build multiple layers on your bracelet for a more complex structure.
- Interlocking Patterns: Create patterns that lock into each other for a weave that’s both beautiful and secure.
- Multilevel Designs: Use a loom to stack levels of bands, creating 3D effects and designs.
- Graduating Colors: Blend colors gradually for an ombre effect that’s visually stunning.
- Incorporating Different Textures: Mix in different types of bands, like glow-in-the-dark or glitter, for varied texture.
As you try these techniques, remember to keep patience and creativity at the forefront. Each new method may take time to learn, but the result is a truly personalized and professional-looking rubber band bracelet. Keep experimenting and pushing the boundaries of your craft!
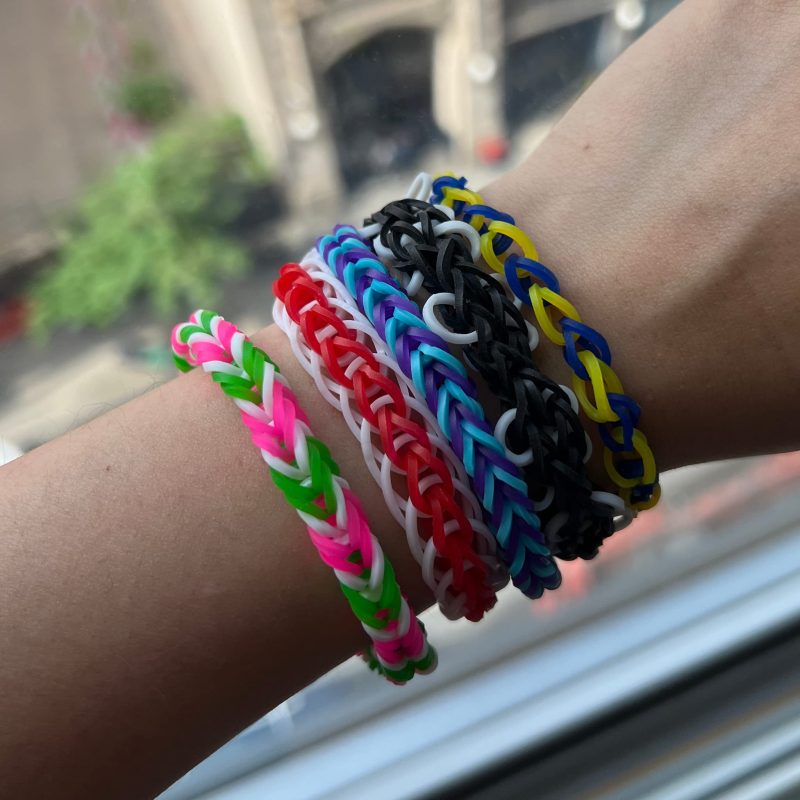
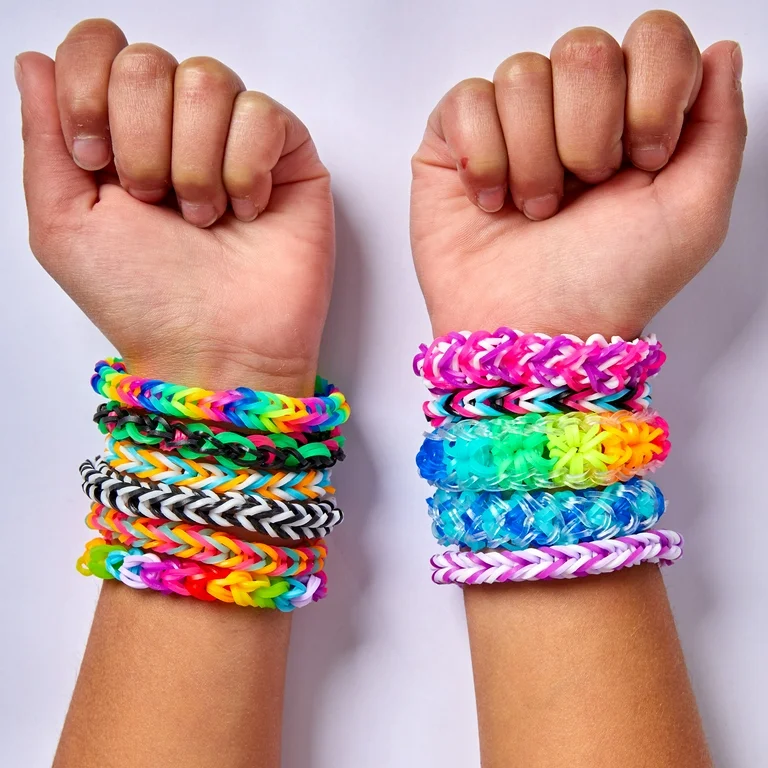
Tips for Styling
Layering for a Trendy Look
Layering multiple rubber band bracelets creates a trendy and dynamic look. Mix different colors, patterns, and styles to add depth and interest to your wrist. This technique allows you to showcase your personality and experiment with various combinations, ensuring that your accessories remain fresh and exciting.
Matching with Outfits
Coordinating rubber band bracelets with your outfits can enhance your overall appearance. For example, pairing vibrant colors with neutral clothing can add a pop of color, while matching bracelet colors to your accessories or shoes can create a cohesive and polished look. Consider the occasion and your personal style when selecting bracelets to complement your ensemble.
Incorporating Charms and Accessories
Adding charms and additional accessories to your rubber band bracelets can elevate their design and make them more personalized. Charms can represent hobbies, interests, or significant life events, adding a meaningful touch to your bracelets. Additionally, incorporating beads or pendants can enhance the visual appeal and make your bracelets stand out.
Seasonal and Themed Designs
Embracing seasonal and themed designs allows you to celebrate holidays and special occasions with your accessories. For instance, you can create bracelets in festive colors for Christmas, spooky designs for Halloween, or romantic themes for Valentine’s Day. This approach adds a fun and relevant element to your style, keeping your accessories aligned with the time of year.
Creative Ideas for Matching Sets and Custom Designs
Make your own rubber band bracelets to craft vibrant, personalized accessories. These stretchy bands are perfect for self-expression or matching rubber band bracelets for friends and loved ones. Here’s how to turn simple bands into standout pieces:
1. DIY Rubber Band Bracelet Basics
- Color Combinations: Mix bold hues (e.g., rainbow stripes) or stick to monochrome gradients for a modern look.
- Pattern Play: Create geometric designs like chevrons or polka dots by layering bands in strategic patterns.
- Tools Needed: A rubber band bracelet maker (or a wooden dowel) and a variety of colored bands.
2. Matching Rubber Band Bracelets Ideas
- Friendship Sets: Coordinate with a friend using shared colors (e.g., pink + gold for Valentine’s Day).
- Couple’s Pairs: Split a design—like half red and half blue—to symbolize unity.
- Theme Matches: Create matching rubber band bracelets for events (e.g., team colors for a sports game).
3. Customization Tips
- Add Charms: Thread small charms (like stars or initials) into the bands for extra flair.
- Layered Looks: Stack multiple bracelets in varying widths for dimension.
Why DIY rubber band bracelets? They’re affordable, easy to adjust, and endlessly customizable. Whether you’re crafting matching bracelets for twins or a solo statement piece, these accessories are perfect for any occasion!
Conclusion
In summary, rubber band bracelets offer a perfect blend of style, affordability, and versatility, making them a must-have accessory for anyone looking to enhance their wardrobe. From their humble beginnings as simple slap bracelets to their current status as fashionable and customizable accessories, rubber band bracelets continue to captivate and inspire. By exploring different styles, embracing DIY projects, and supporting sustainable practices, you can fully appreciate the charm and functionality of rubber band bracelets. Whether you’re seeking a casual addition to your everyday look or a unique gift for a loved one, rubber band bracelets provide endless possibilities to express your creativity and individuality. Embrace the trend and let these colorful bands add a touch of flair to your personal style.